HashiCorp Vault: Deploy to Azure Container Instance using Azure Portal
How to deploy an instance in under 5 minutes
Executive technology leader responsible for platform reliability, cloud operations, security posture, and enterprise technology risk within an investor-backed fintech environment. I lead technology operations at the intersection of engineering execution, governance, and business outcomes — ensuring platforms are scalable, resilient, and trusted by investors, regulators, and clients.
Currently VP of DevOps at InvestorFlow, where I focus on building board-ready technology operations, strengthening risk and resilience, and shaping long-term platform strategy to support growth and regulatory confidence.
This guide demonstrates deploying an Azure Container Instance of HashiCorp Vault using Azure Portal. This will be a no-code deployment. A follow-up blog on a HashiCorp Terraform deployment will be released soon.
The purpose of this guide:
Demonstrate a fast release of a container image on Azure without coding knowledge
Familiarise yourself with Azure Container Instances in the Azure Portal
Test and play with HashiCorp Vault
For best practice, I always recommend that production (really all) resources be "as code" for both the infrastructure and the app. As such, I would not follow this guide to implement a production release but to build up your skills and knowledge of services.
What do you need
You will need the following to complete this guide:
Azure Portal access with permissions in a subscription to create an Azure Container Instance
Ability to access websites by specifying the custom port number 8200. Some organisations block port numbers on their company firewall
Everything we do will be through a browser, so no software installation is required.
HashiCorp Vault Deployment
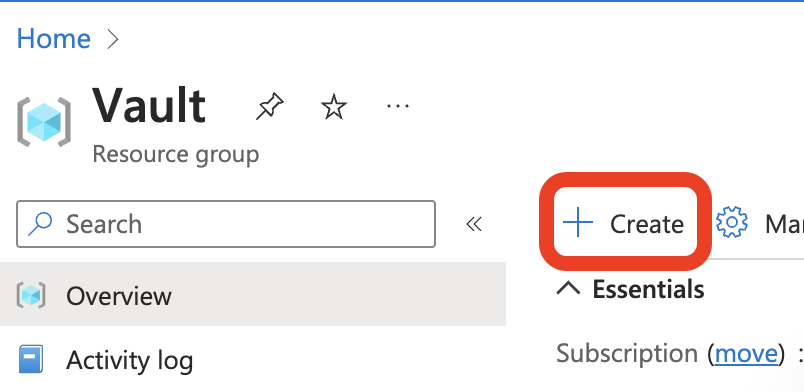
Within the resource group you want to create the Container Instance, select the Create button
.
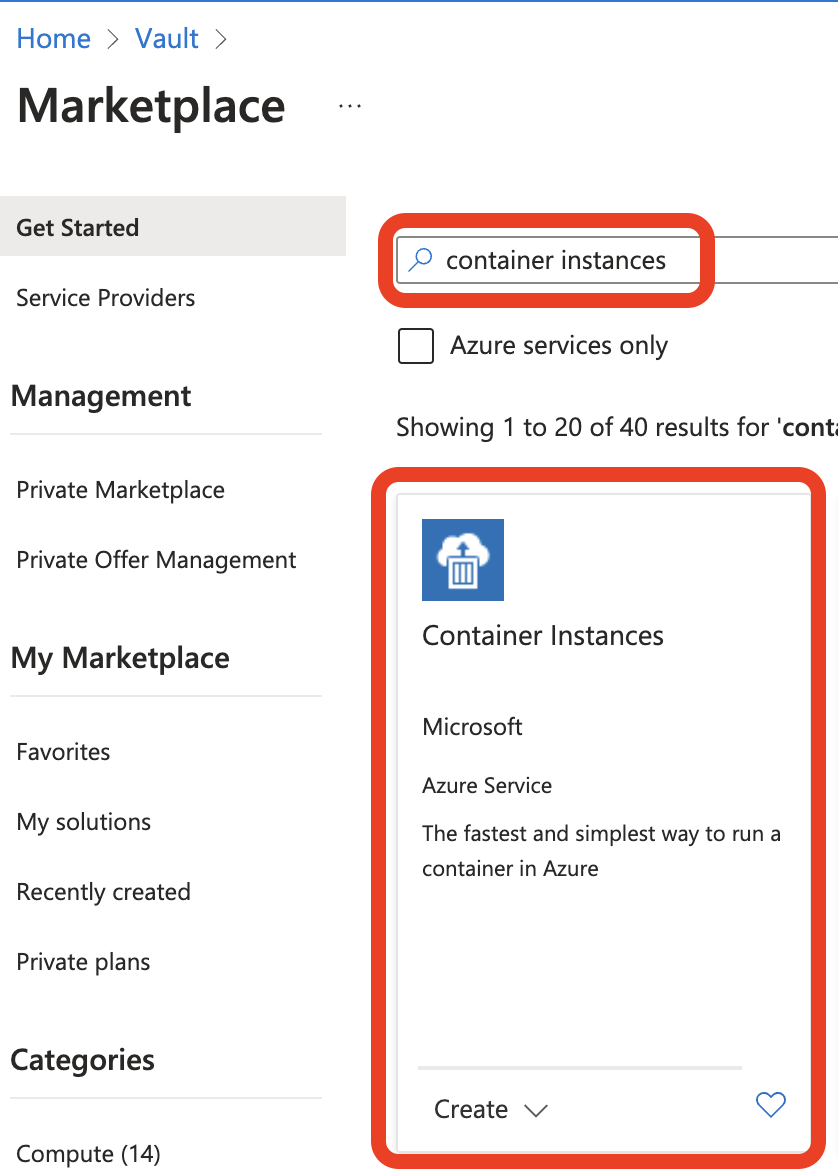
Search for Container Instances. When you found the Container Instances resources, select Create.
In the first window, you will need to complete the container details.
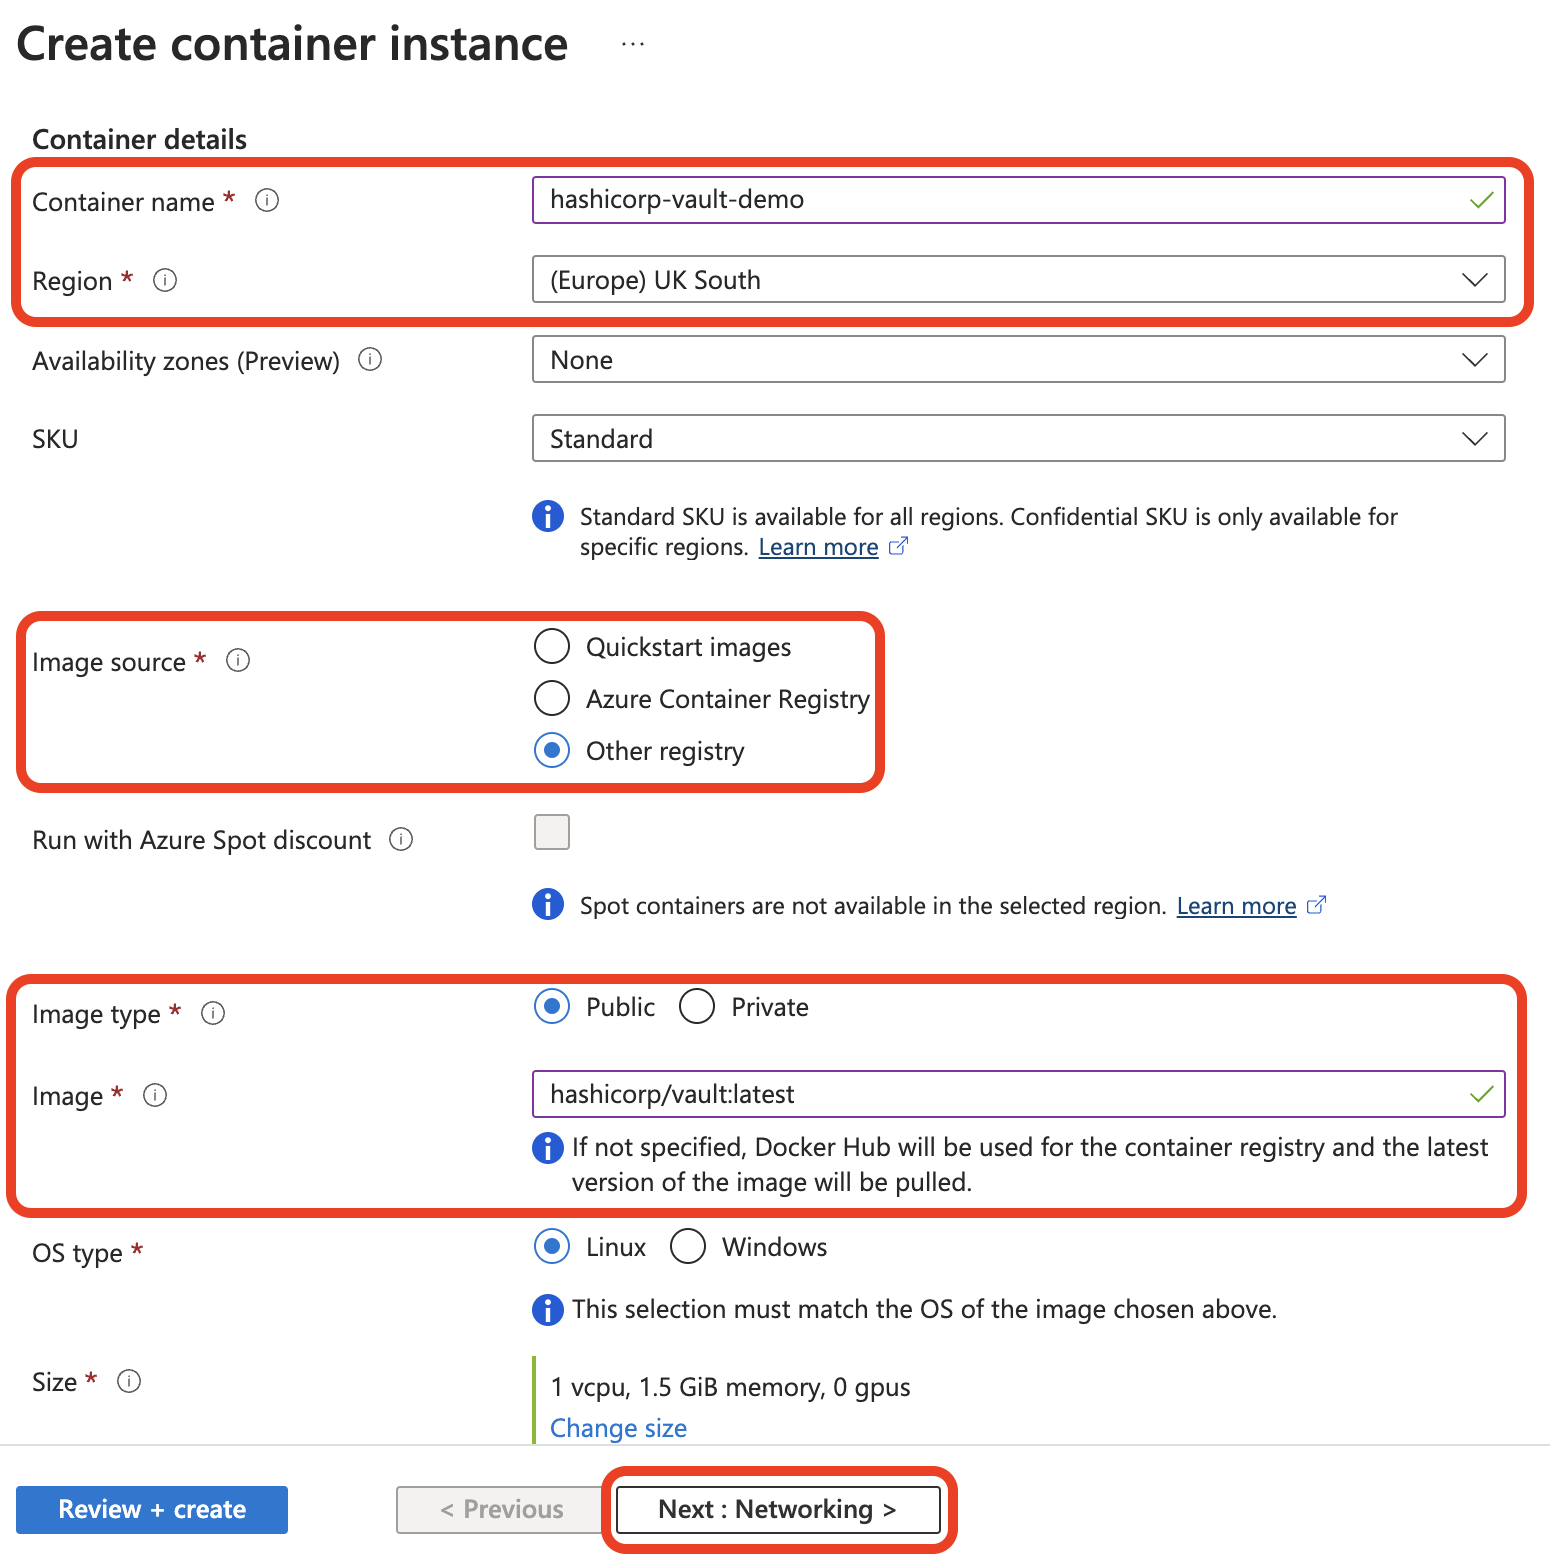
The container details I have used for this demo is below (or above in the screenshot) that you can configure, leaving everything else as default:
Container name - The name of the container (hashicorp-vault-demo)
Region - Where the resource will be located (UK South)
Image source - Where to download the container image from (Other registry)
Image type - Is the image accesible publicly or behind authentication (Public)
Image - The path of the registry with the image and version (hashicorp/vault:latest)
When ready, select Next: Networking > to continue
We now need to enter the networking information. For this, please remember that this is a demo instance for the purpose of showing you how to deploy a container instance quickly, but this configuration will mean the instance is accessible over the internet by anyone. Make sure to reconfigure these settings if you are planning to store information in the instance.
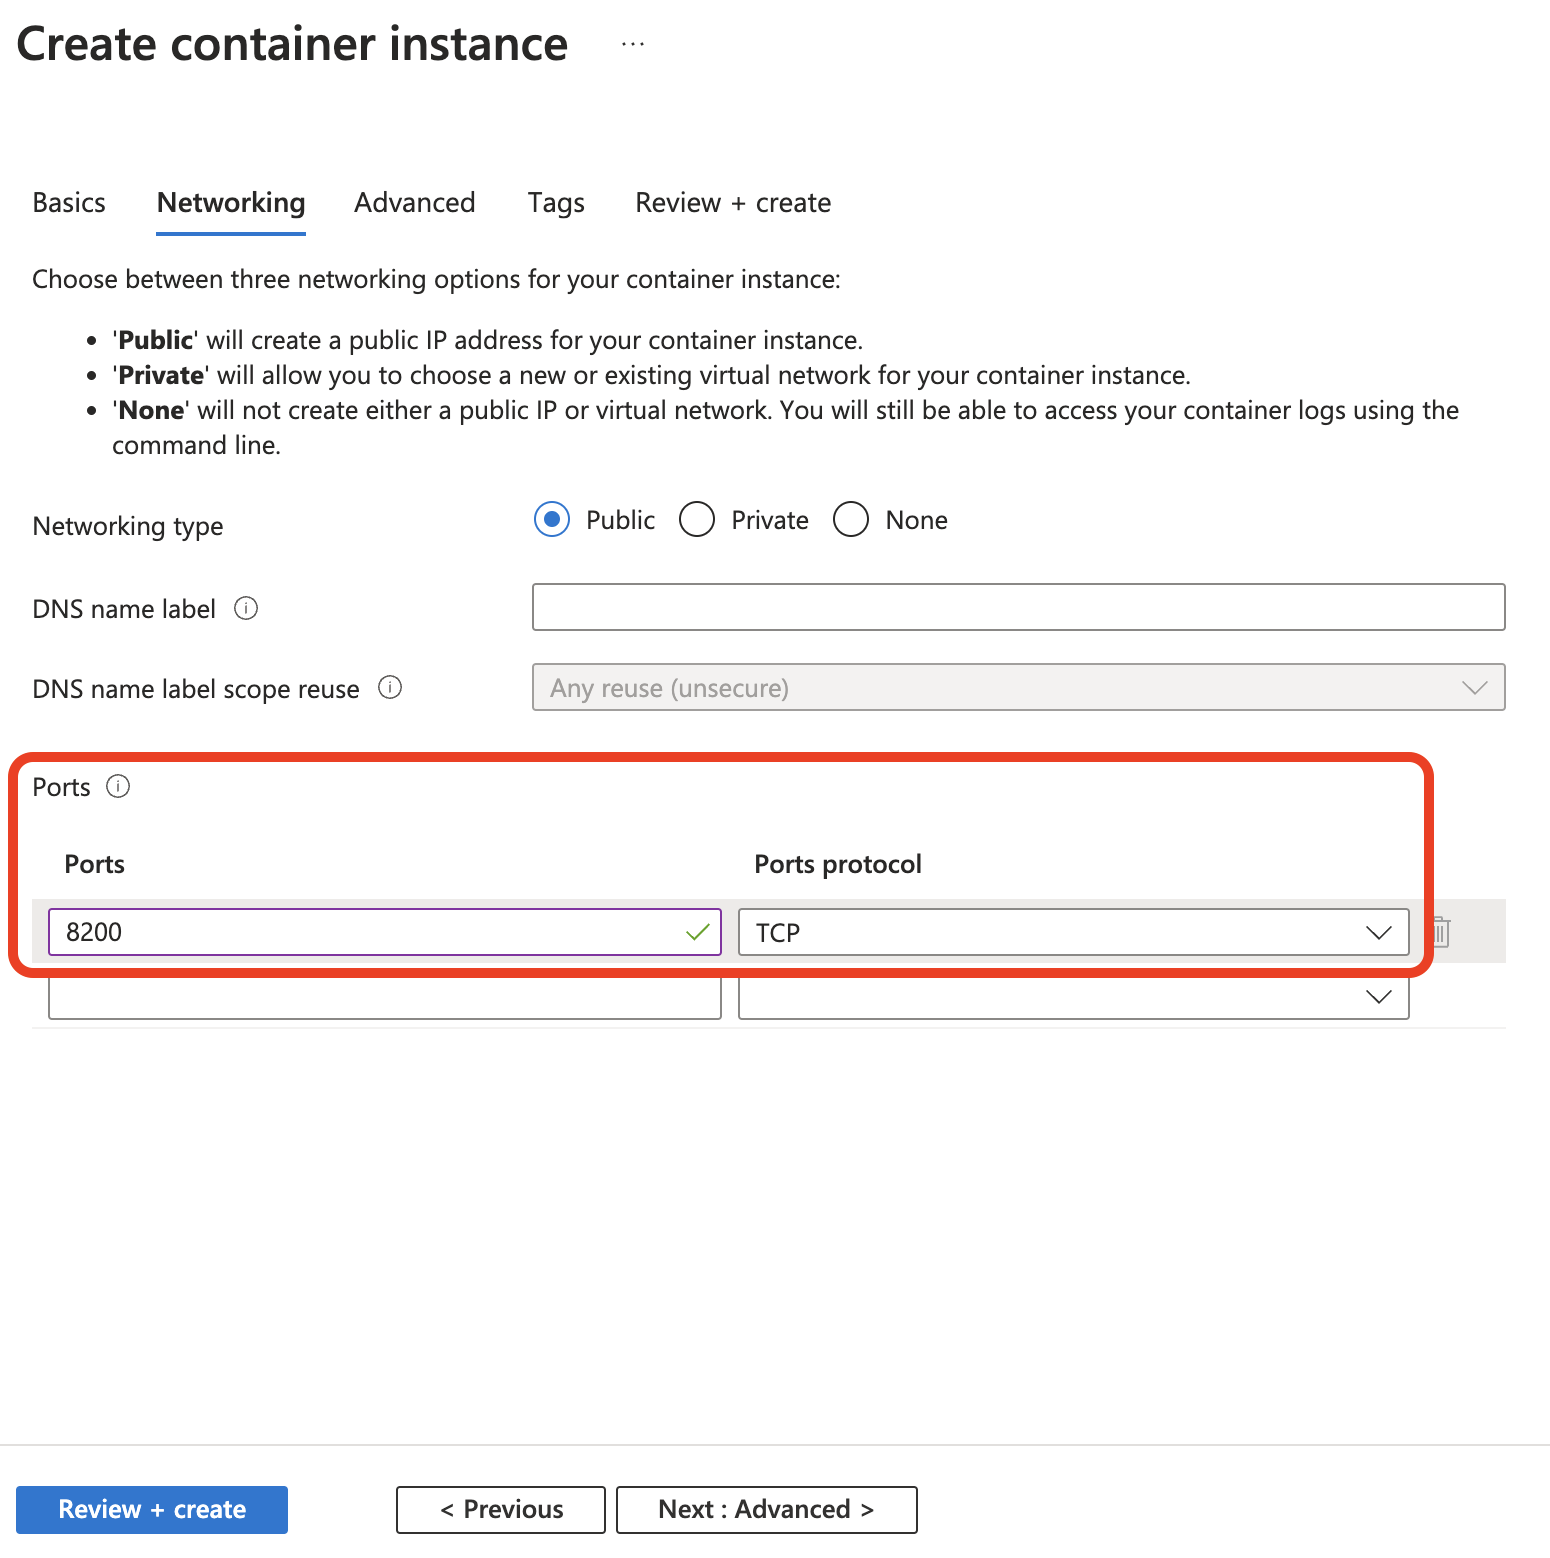
The only change in this window will be the Ports as HashiCorp Vault is configured to use port8200. I replaced the pre-populated port 80 for this reason.
When ready, select the Review + create tab.
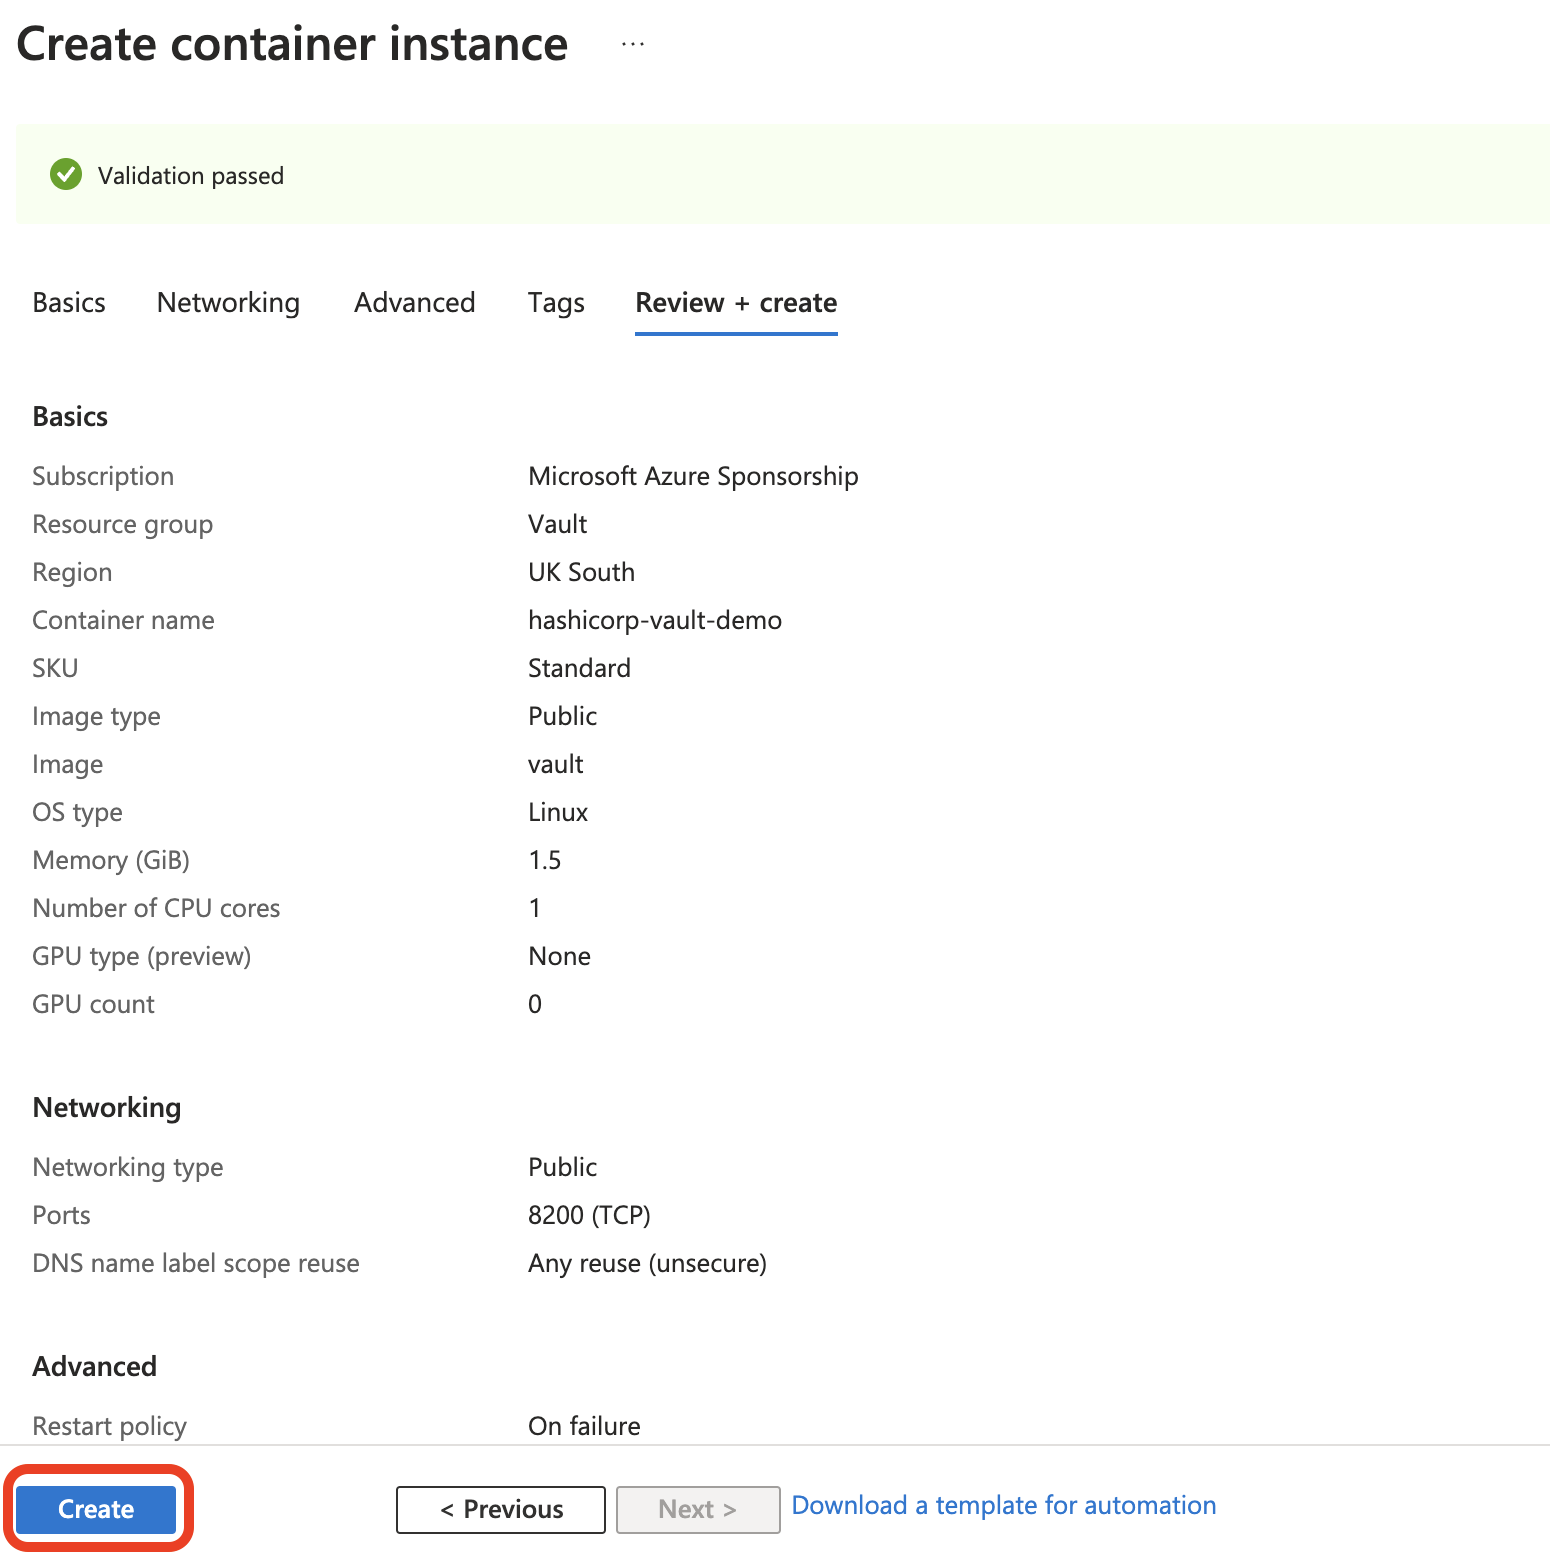
The review window will display all the configurations you have set. Select the Create button to start the build
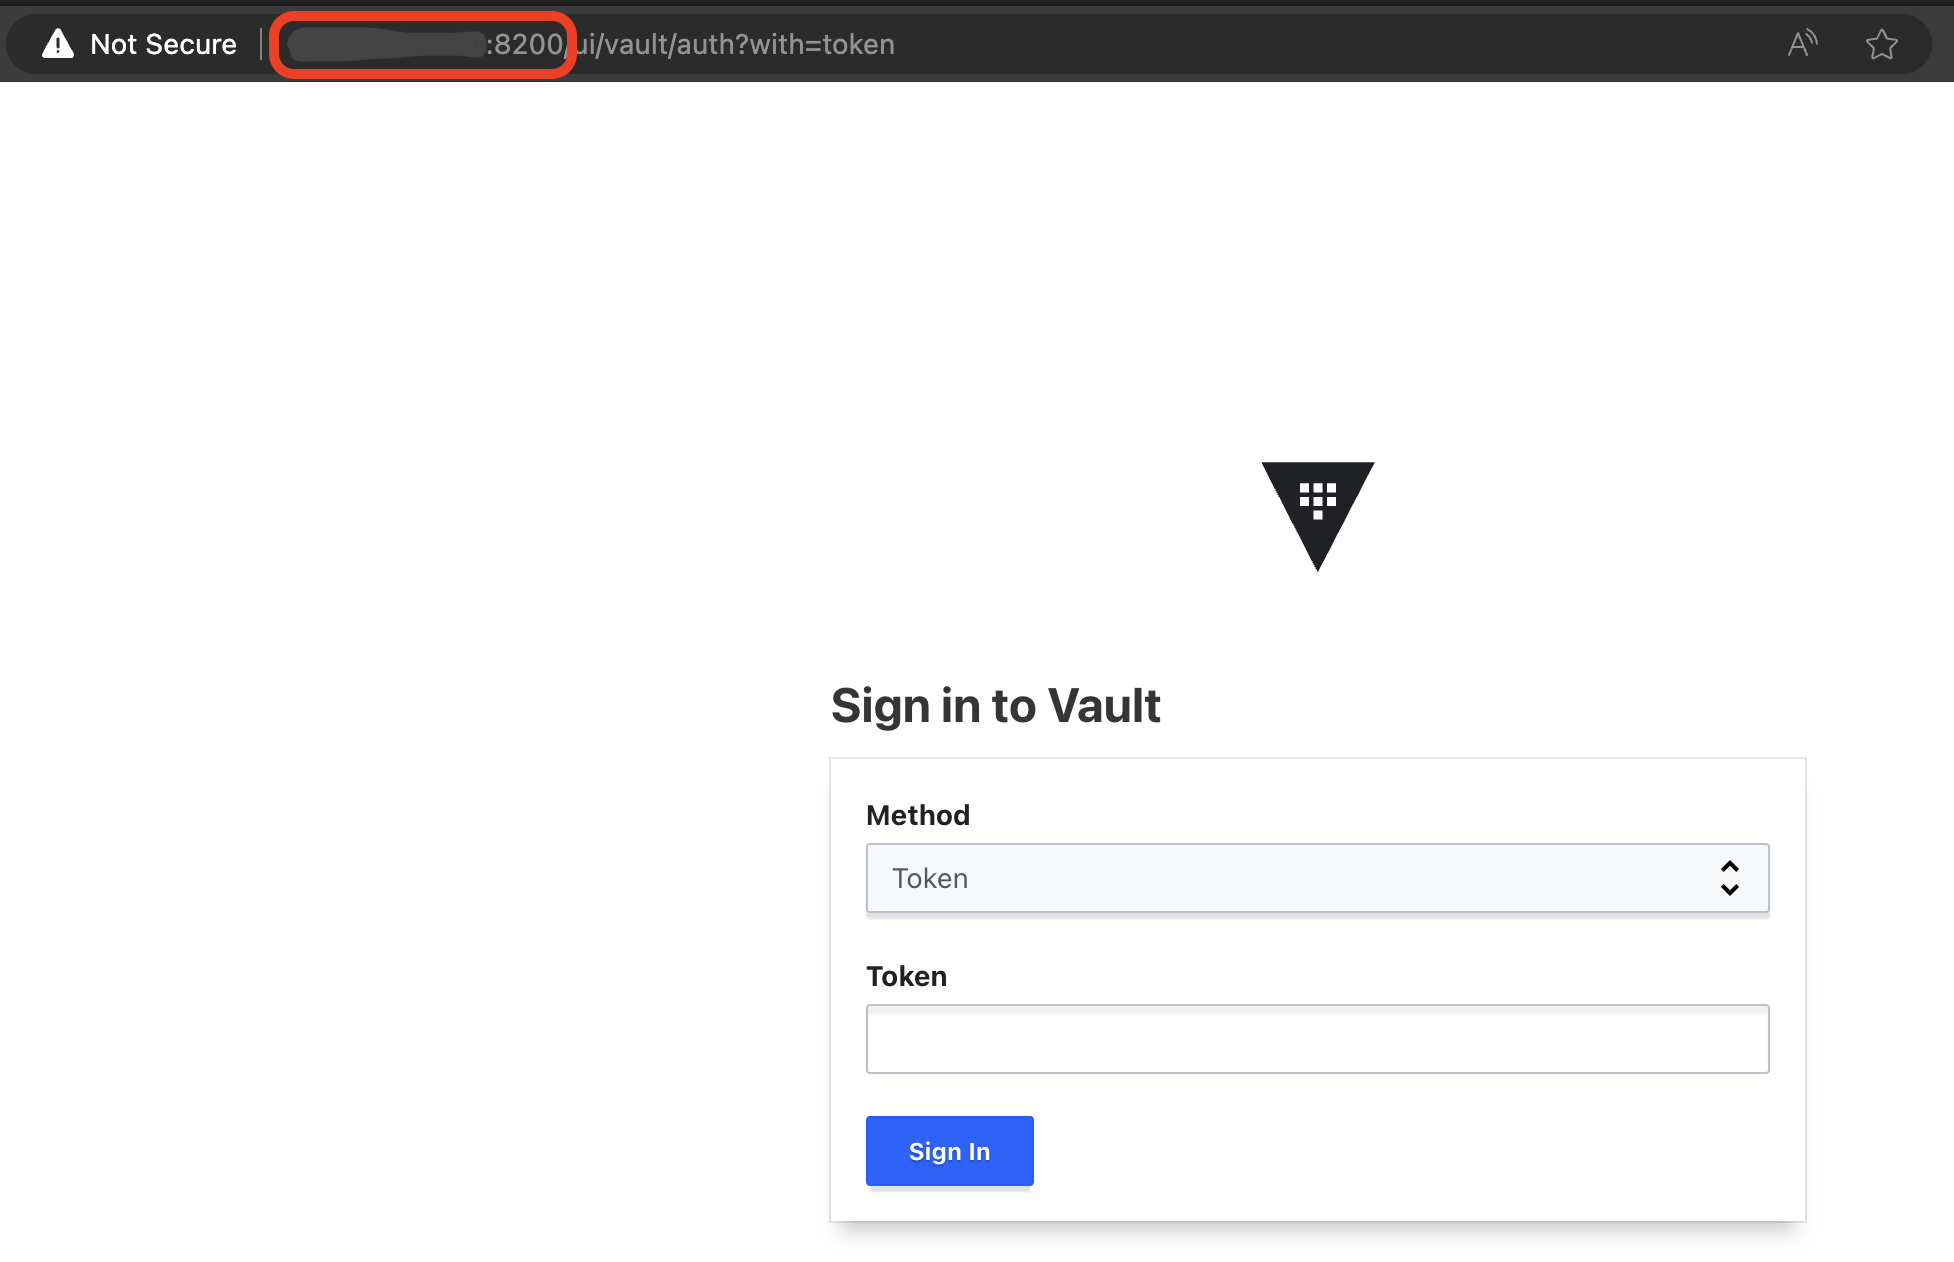
Once the resource is created, you can then view the IP address that was assigned. As we didn't configure a FQDN (Fully Qualified Domain Name), you will have to use the IP address to access the website.
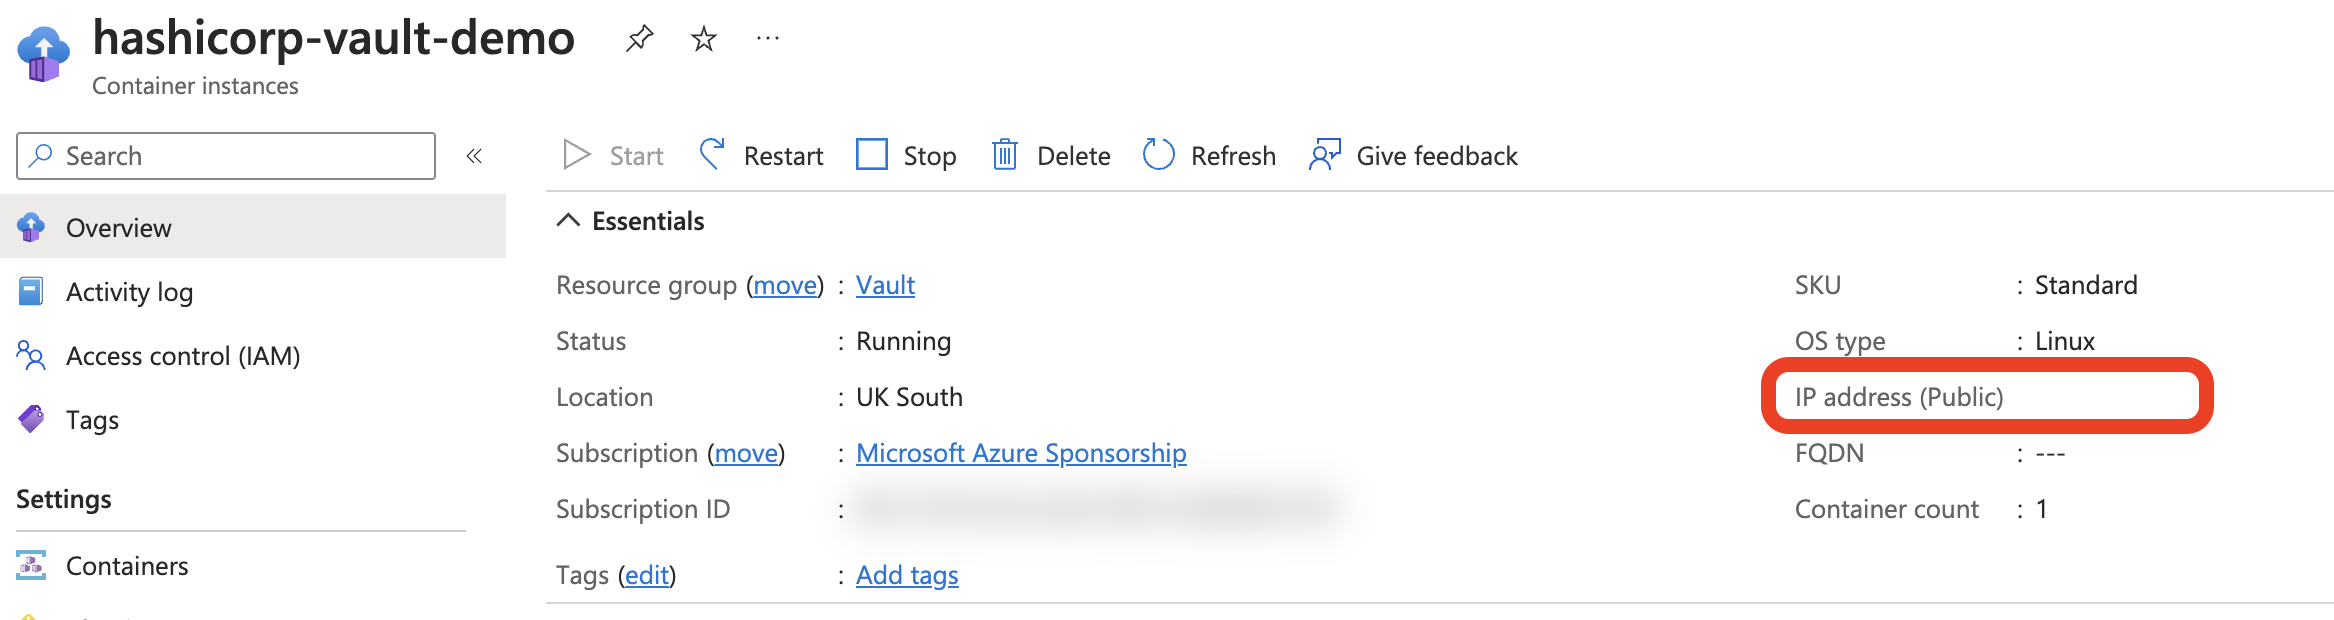
Open a new browser tab, and enter the following address: http://MYIPADDRESS:8200, where MYIPADDRESS is the public IP address in the resource window (as described above). Here you will have public access to the Vault instance.