Manage GitHub Copilot seats using Teams
Executive technology leader responsible for platform reliability, cloud operations, security posture, and enterprise technology risk within an investor-backed fintech environment. I lead technology operations at the intersection of engineering execution, governance, and business outcomes — ensuring platforms are scalable, resilient, and trusted by investors, regulators, and clients.
Currently VP of DevOps at InvestorFlow, where I focus on building board-ready technology operations, strengthening risk and resilience, and shaping long-term platform strategy to support growth and regulatory confidence.
Are you looking for a better way to manage your Copilot seats? Managing this can be made simpler by adding a GitHub team for seat assignments, which allows any user assigned to a team to be automatically licensed.
In this post, I will cover how to create a secret GitHub team that is not visible to the organisation users and how to add this team to the assignments in Copilot settings.
Create a Secret Team
Within your organisation, select the Teams tab and click the New team button

Give your team an appropriate name that represents its purpose. Set the team's visibility to Secret and notifications to Disabled.
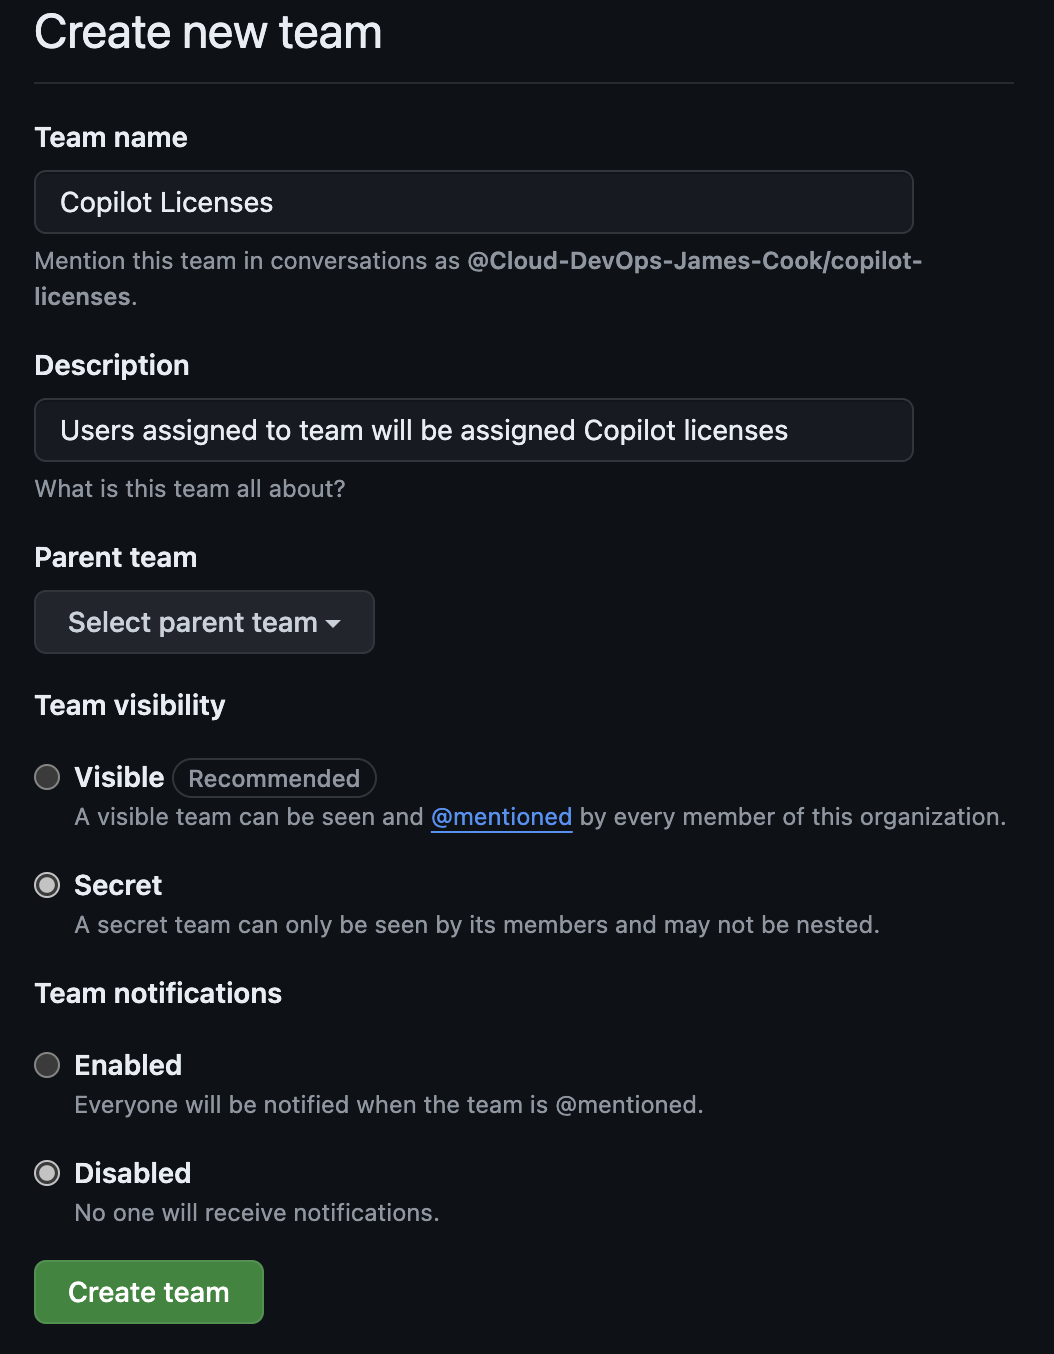
When ready, click the Create team button
Add Team to Copilot Access
Select the Settings tab within your organisation
Select Copilot from the side menu and select Access. If you haven't already, enable Copilot on your organisation.
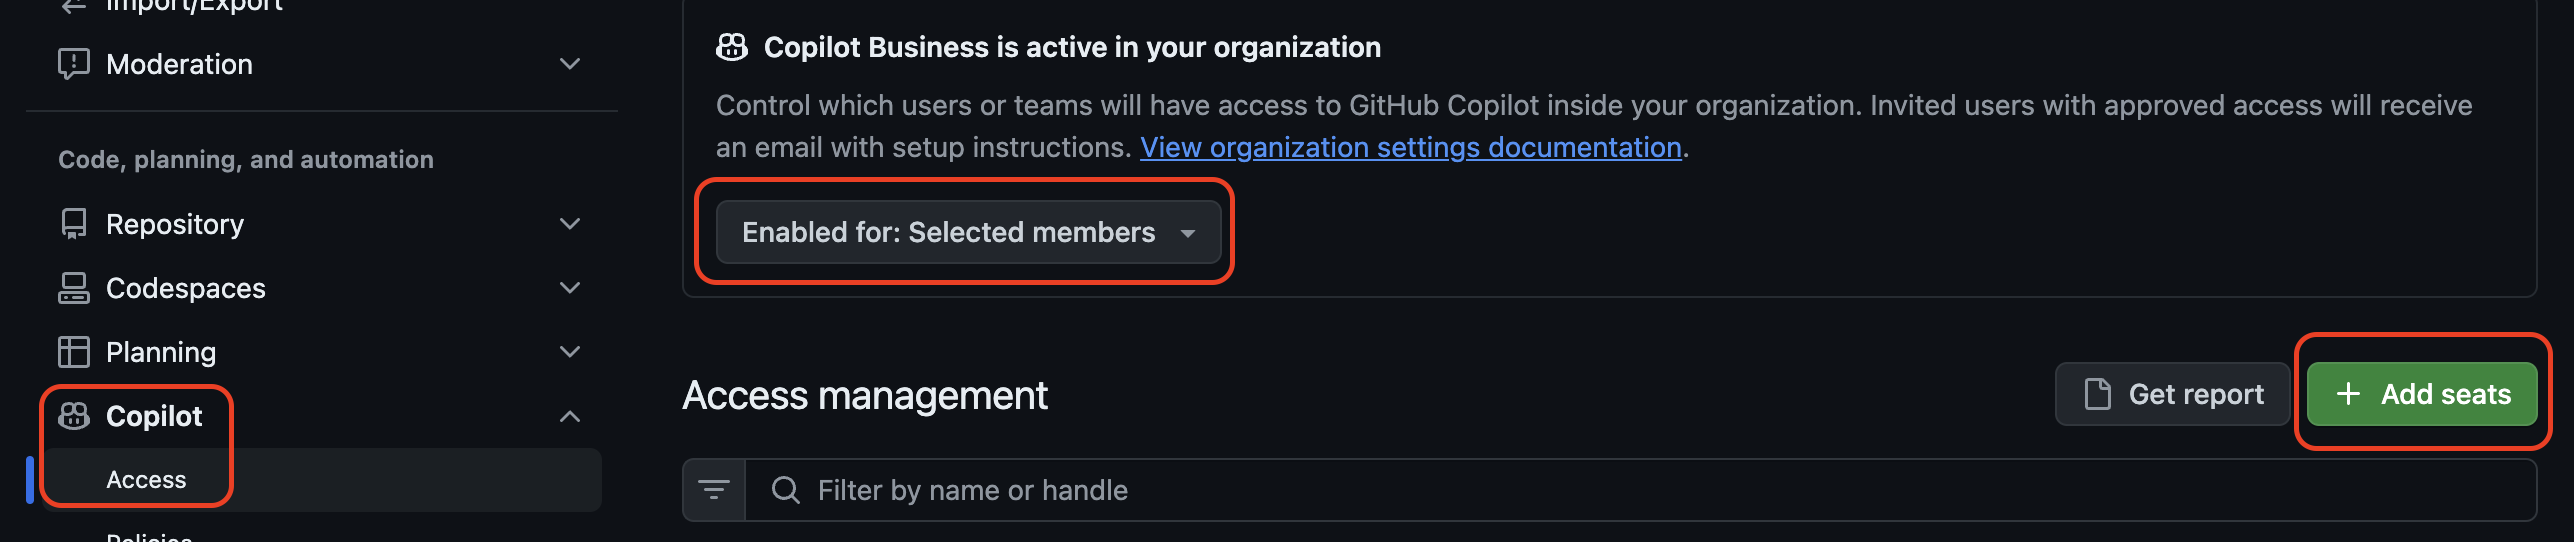
Under the heading Copliot Business is active in your organization, select the dropdown and choose Enabled for: Selected members from the options.
Then select the Add seats button
From here, search for the team you created and select Continue to purchase.
Now, every time you add a user to your Copilot team, they will automatically be assigned a seat, and there is no need to go into settings to make the purchase.