


Static Code Analyses - Checkov, Terraform and Azure DevOps
Infrastructure as Code (IaC) analyses tools for Terraform


Static Code Analyses is a method of reviewing code against policies before deploying it, identifying weaknesses before they are live vulnerabilities in your environment. This is not new, tools for this purpose have been around for a while for development teams but we are talking about Infrastructure as Code (IaC), a practice that hasn't been around as long so the tools available are very few in comparison.
In this post I am covering Static Code Analyses using three tools, these are:
Azure DevOps - a CI/CD platform provided by Microsoft for developers. We will use this to store the IaC and run the code analyses.
Terraform - this is the IaC tool we will use to write our code for Azure infrastructure.
Checkov - we will use this tool by bridgecrew (their open source version) to analyse the code we write in Terraform.
In future posts I will look at other Static Code Analyses tools and will draw comparisons between them.
The Code
For this, I have created an example Terraform configuration file which contains bad practices like password in plain text. This will allow me to test the tool as it should flag some of these bad practices.
This is the code example:
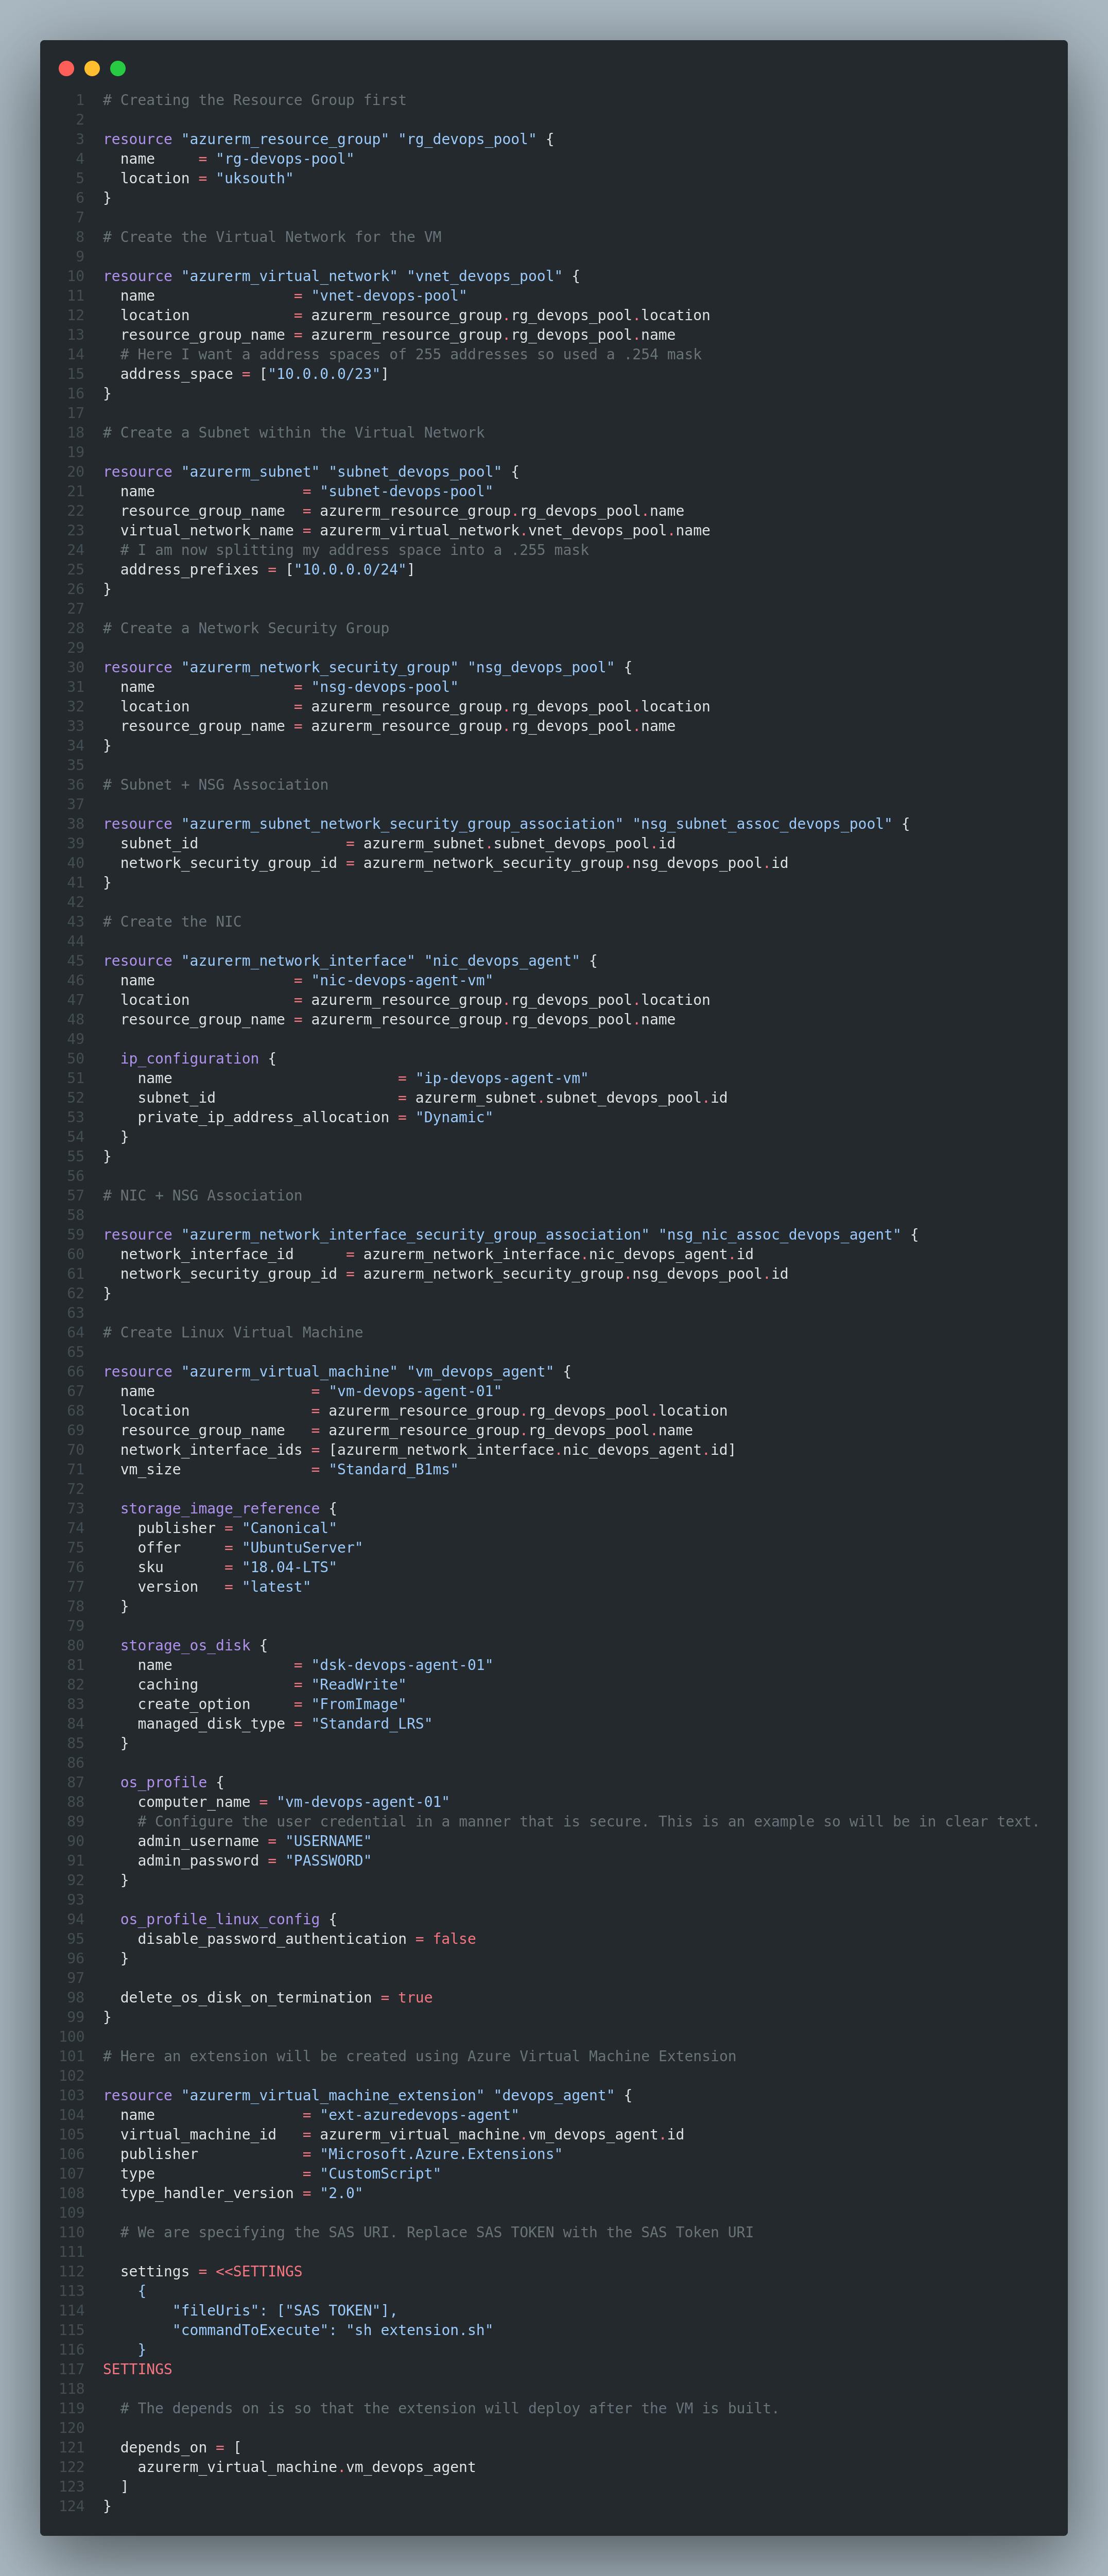
This will be stored in an Azure DevOps repository but you can also use a third party repository like GitHub.
Pipeline Configuration
First we need to create the pipeline within Azure DevOps. This will be used to run Checkov to analyse the code. You will want to open your project within Azure DevOps and go into Pipelines.
Now you want to create a pipeline for this. Select the new pipeline option and within the new window select Use the classic editor.

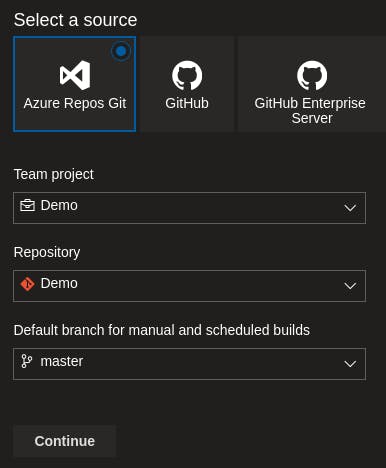
Here you want to select the repository where the configuration file is stored. I have stored it in an Azure DevOps repository so will select this as my location.
Once selected, you will then need to select Empty job as the template option for this pipeline.

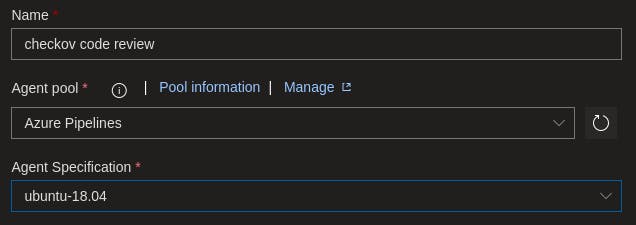
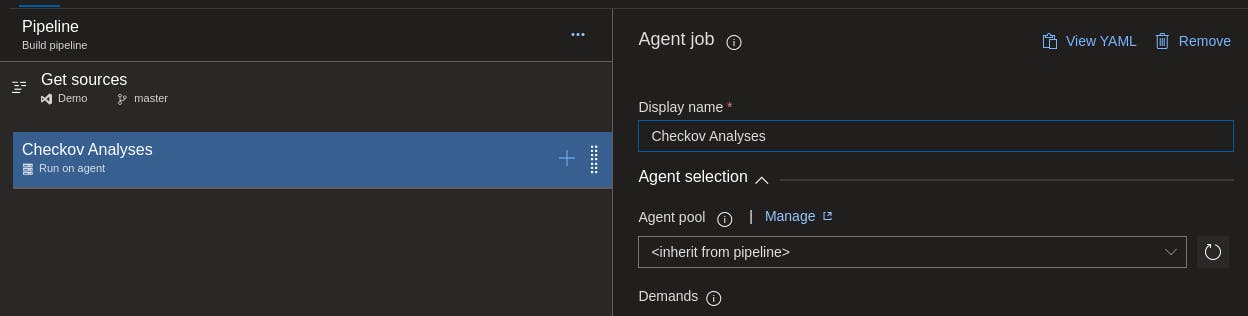
The first fields will appear asking you to give the pipeline a name and select the agent pools you want to use. For this demo, I have selected to use Hosted Agents where I will run Checkov on an Ubuntu OS. Below are the configurations I set.
After all fields are filled, you want to select the Run on agent option and configure the agent job name. I opted to calling the agent Checkov Analyses as it seemed appropriate for what it is doing.
Now we are going to select the plus icon on the run on agent field to add a job. You will be asked to select something from your currently installed extensions or from the marketplace. We will initially need to install Terraform as this is a prerequisite of Checkov, so we will need to use the Terraform extension from the marketplace (you may have this already so skip this step).
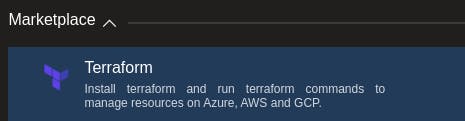
Once acquired from the marketplace you can then select to install Terraform.

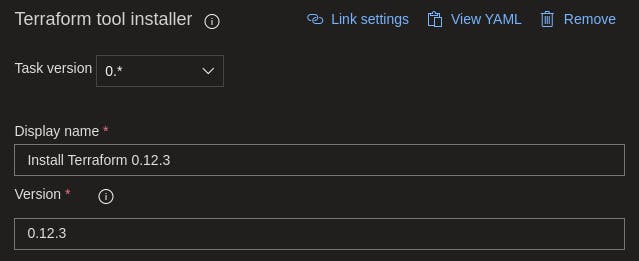
Within the Terraform configuration window of the extension, select the version of Terraform you want to run on the Hosted Agent (as of writing this, v0.15.0 of Terraform has a bug that stops the initialisation, this may cause Checkov not to function so use an earlier version).
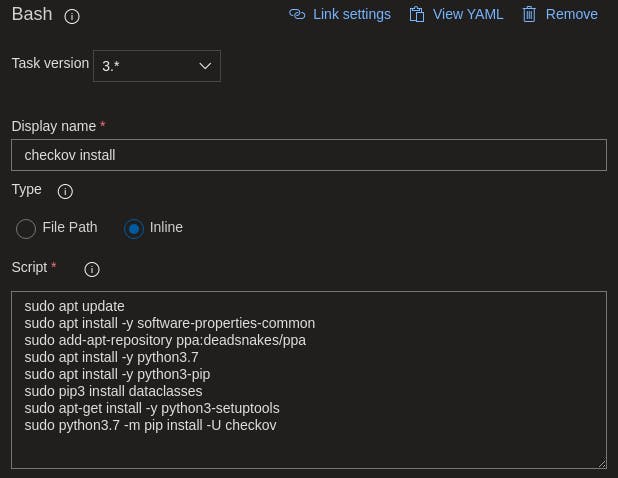
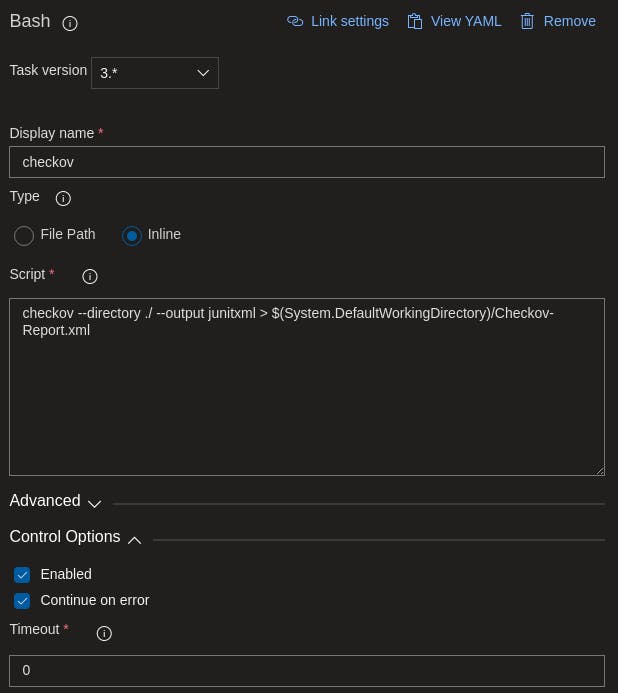
Select the plus icon on the Run on agent and select the Bash extension.

Here you want to install Checkov with further prerequisites using the inline function. Here is what I used to install the prerequisites and Checkov.
Repeat the process of adding another Bash extension to the pipeline and this time we are configuring the inline so Checkov can run the analyses and output the results into an xml file. Make sure to also tick under Control Options heading the Continue on error option or it will fail the pipeline run.
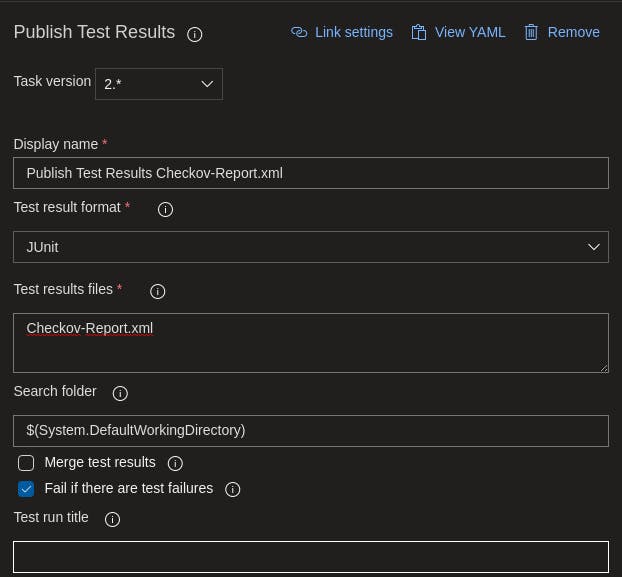
Again, select the plus icon on Run on agent and select the Publish Test Results extension.

Now we are importing the xml output from Checkov into the test results feature in Azure DevOps. Here is the configurations I used to import.
Once all configured, select Save on the Pipeline.
Pipeline Run
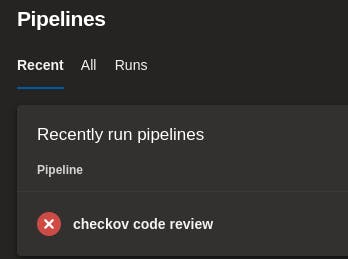
You are now ready to run the pipeline. All you need to do is select the Run option under the three dotted icon next to the pipeline name. The pipeline will report a failure if Checkov flags something in its analyses, if nothing is flagged the pipeline will succeed.
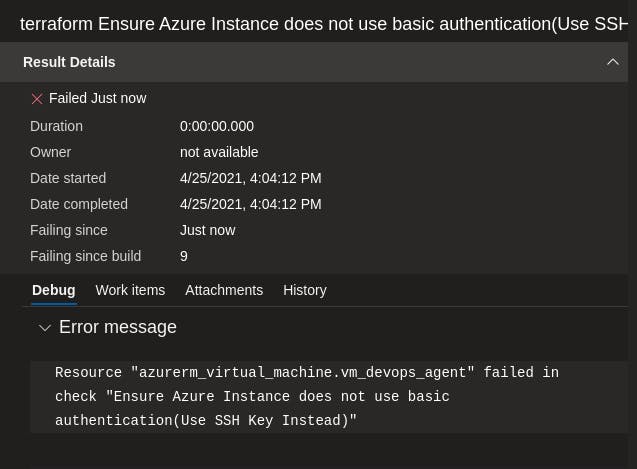
In my code, I have been flagged by Checkov which has set the status of the pipeline build as failed.
Code Analyses Report
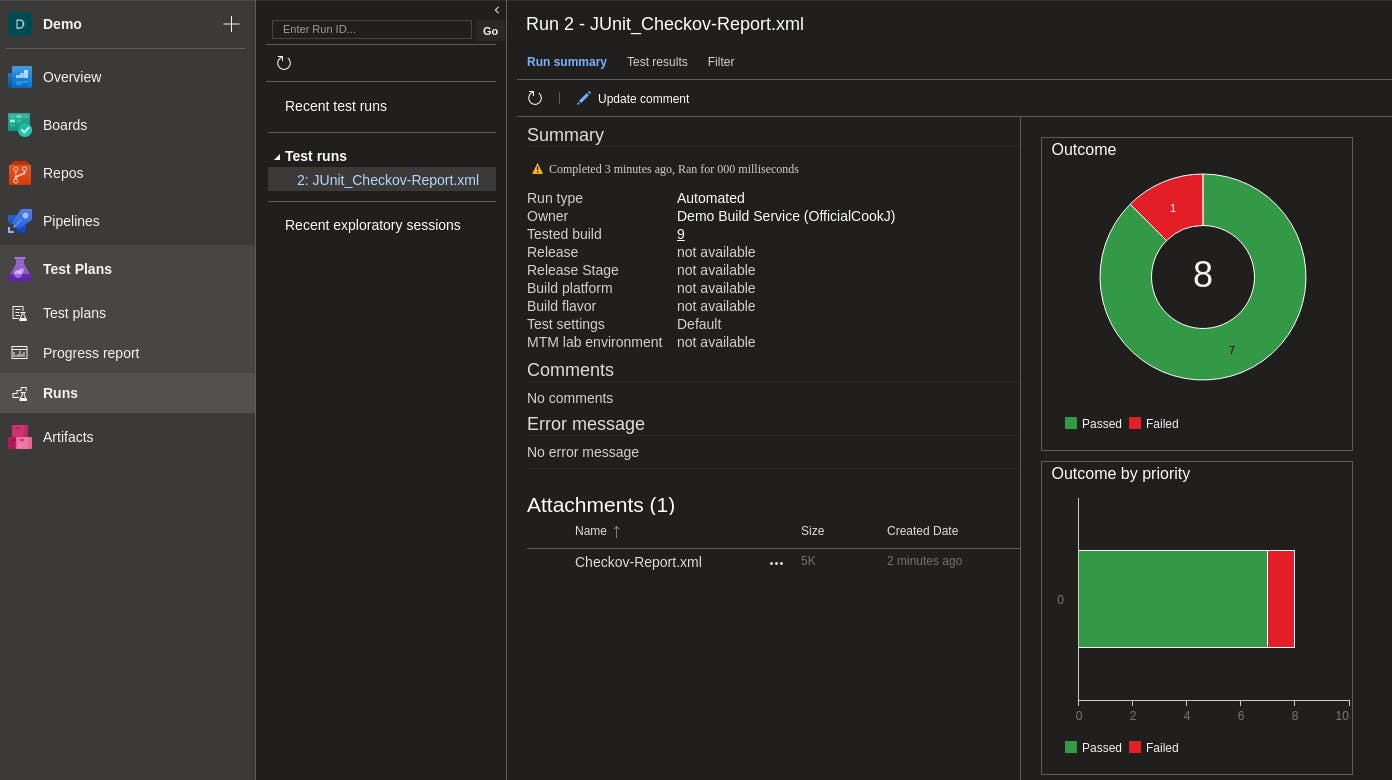
Now we have the pipeline running and the report being published into the Azure DevOps test reports, we can review these reports in two location. The first is within the pipeline build, select the pipeline job and open the tab Tests. Here you will see the tests than was ran by Checkov, what passed and failed and reasons for this.
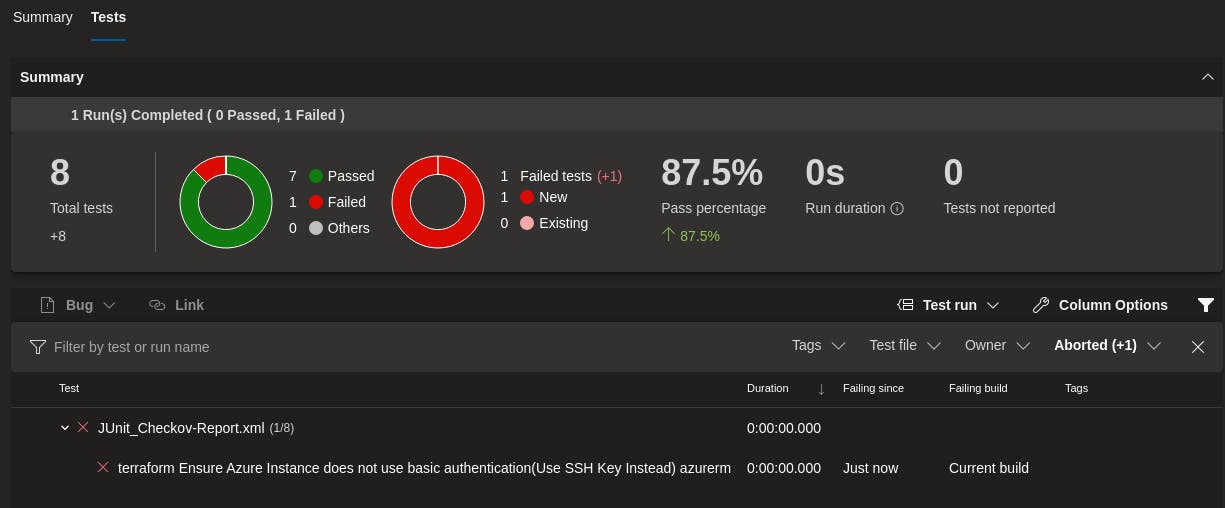
Clicking on the flagged test failure, you will see more details as to why it failed.
Alternatively, you can view the test reports via the side menu under Test Plans and Runs
You can do more with Checkov but this will not be covered in this post but future posts on the topic. In the meantime, checkout the Checkov GitHub page for more information.