

Azure Synapse Analytics - Git Integration and CI/CD
Using GitHub and GitHub Actions with Azure Synapse


Azure Synapse Analytics is a data services tool that provides data integration, warehousing, and analytical functionality. Microsoft has included source control as part of Synapse using Git, allowing version control, pull requests, and release management. This post will cover how we can configure Git, what a branching strategy can look like, and where CI/CD fits in. You will also learn about the limitations of its Git integration that developers struggle with.
Why Git
I believe that integrating Git into Synapse provides the ideal DevOps solution to deliver CI/CD, version control and peer reviews. Yes, the Git integration is not perfect, and I will get onto that later in the post, but we have to start somewhere, and I believe what we have available today is enough to start using Git.
By using a form of source control, we can deliver identical changes across environments, increasing success rates and lowering the chance of an impact on production.
Synapse Environment
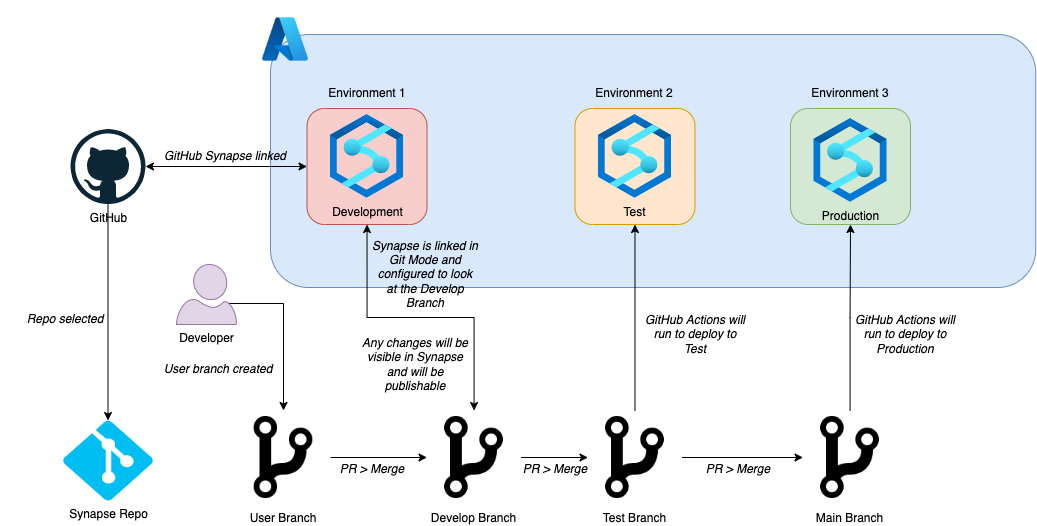
For this purpose, our Synapse architecture will include three environments, Development, Test, and Production. Each environment will consist of its own Synapse Analytics resource, configured to be identical, allowing for accurate simulations (sizing of connected resources may differentiate to reduce costs).
Configure Git branches
You will want three branches within the Git repository (I am using GitHub to host). Name them using a similar naming convention:
- develop - this will be connected to your development Synapse
- test - this will be used to push releases into the test Synapse
- main - this will be used to push releases into the production Synapse
Each branch should have branch protection enabled to prevent deletion.
Configure GitHub Environments
We will create three GitHub Environments, each representing a Synapse instance.
To create an environment:
Open your GitHub repository in the Web UI
Select Settings
From the side menu, select Environments
Click the New environment button
Give your environment a name and click Configure environment
Repeating the above steps, I have the following environments:
- develop
- test
- production
The environment names need to match for the CI/CD to work based on the configuration later described.
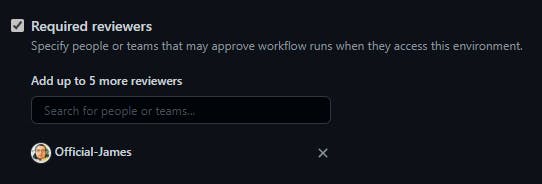
I have enabled Required reviewers in each environment and added myself. When we run a job within a workflow against any of these environments, I do not want it to proceed until my approval. If you don't have this selected, our workflow will automatically deploy to the environment once the Pull Request merges.
For the time being, though, keep this disabled for develop until you do the initial sync with Synapse.
Connect Azure Synapse to a Repository
Once the Synapse Analytics resources have been deployed and the Git branches and environments created, we will connect Azure Synapse to our Git repository. As part of Microsoft's recommendations, we will connect Synapse to our repository only for the Development resource. We will be utilising alternative functionality (powered by GitHub Actions) to push changes into the other environments.
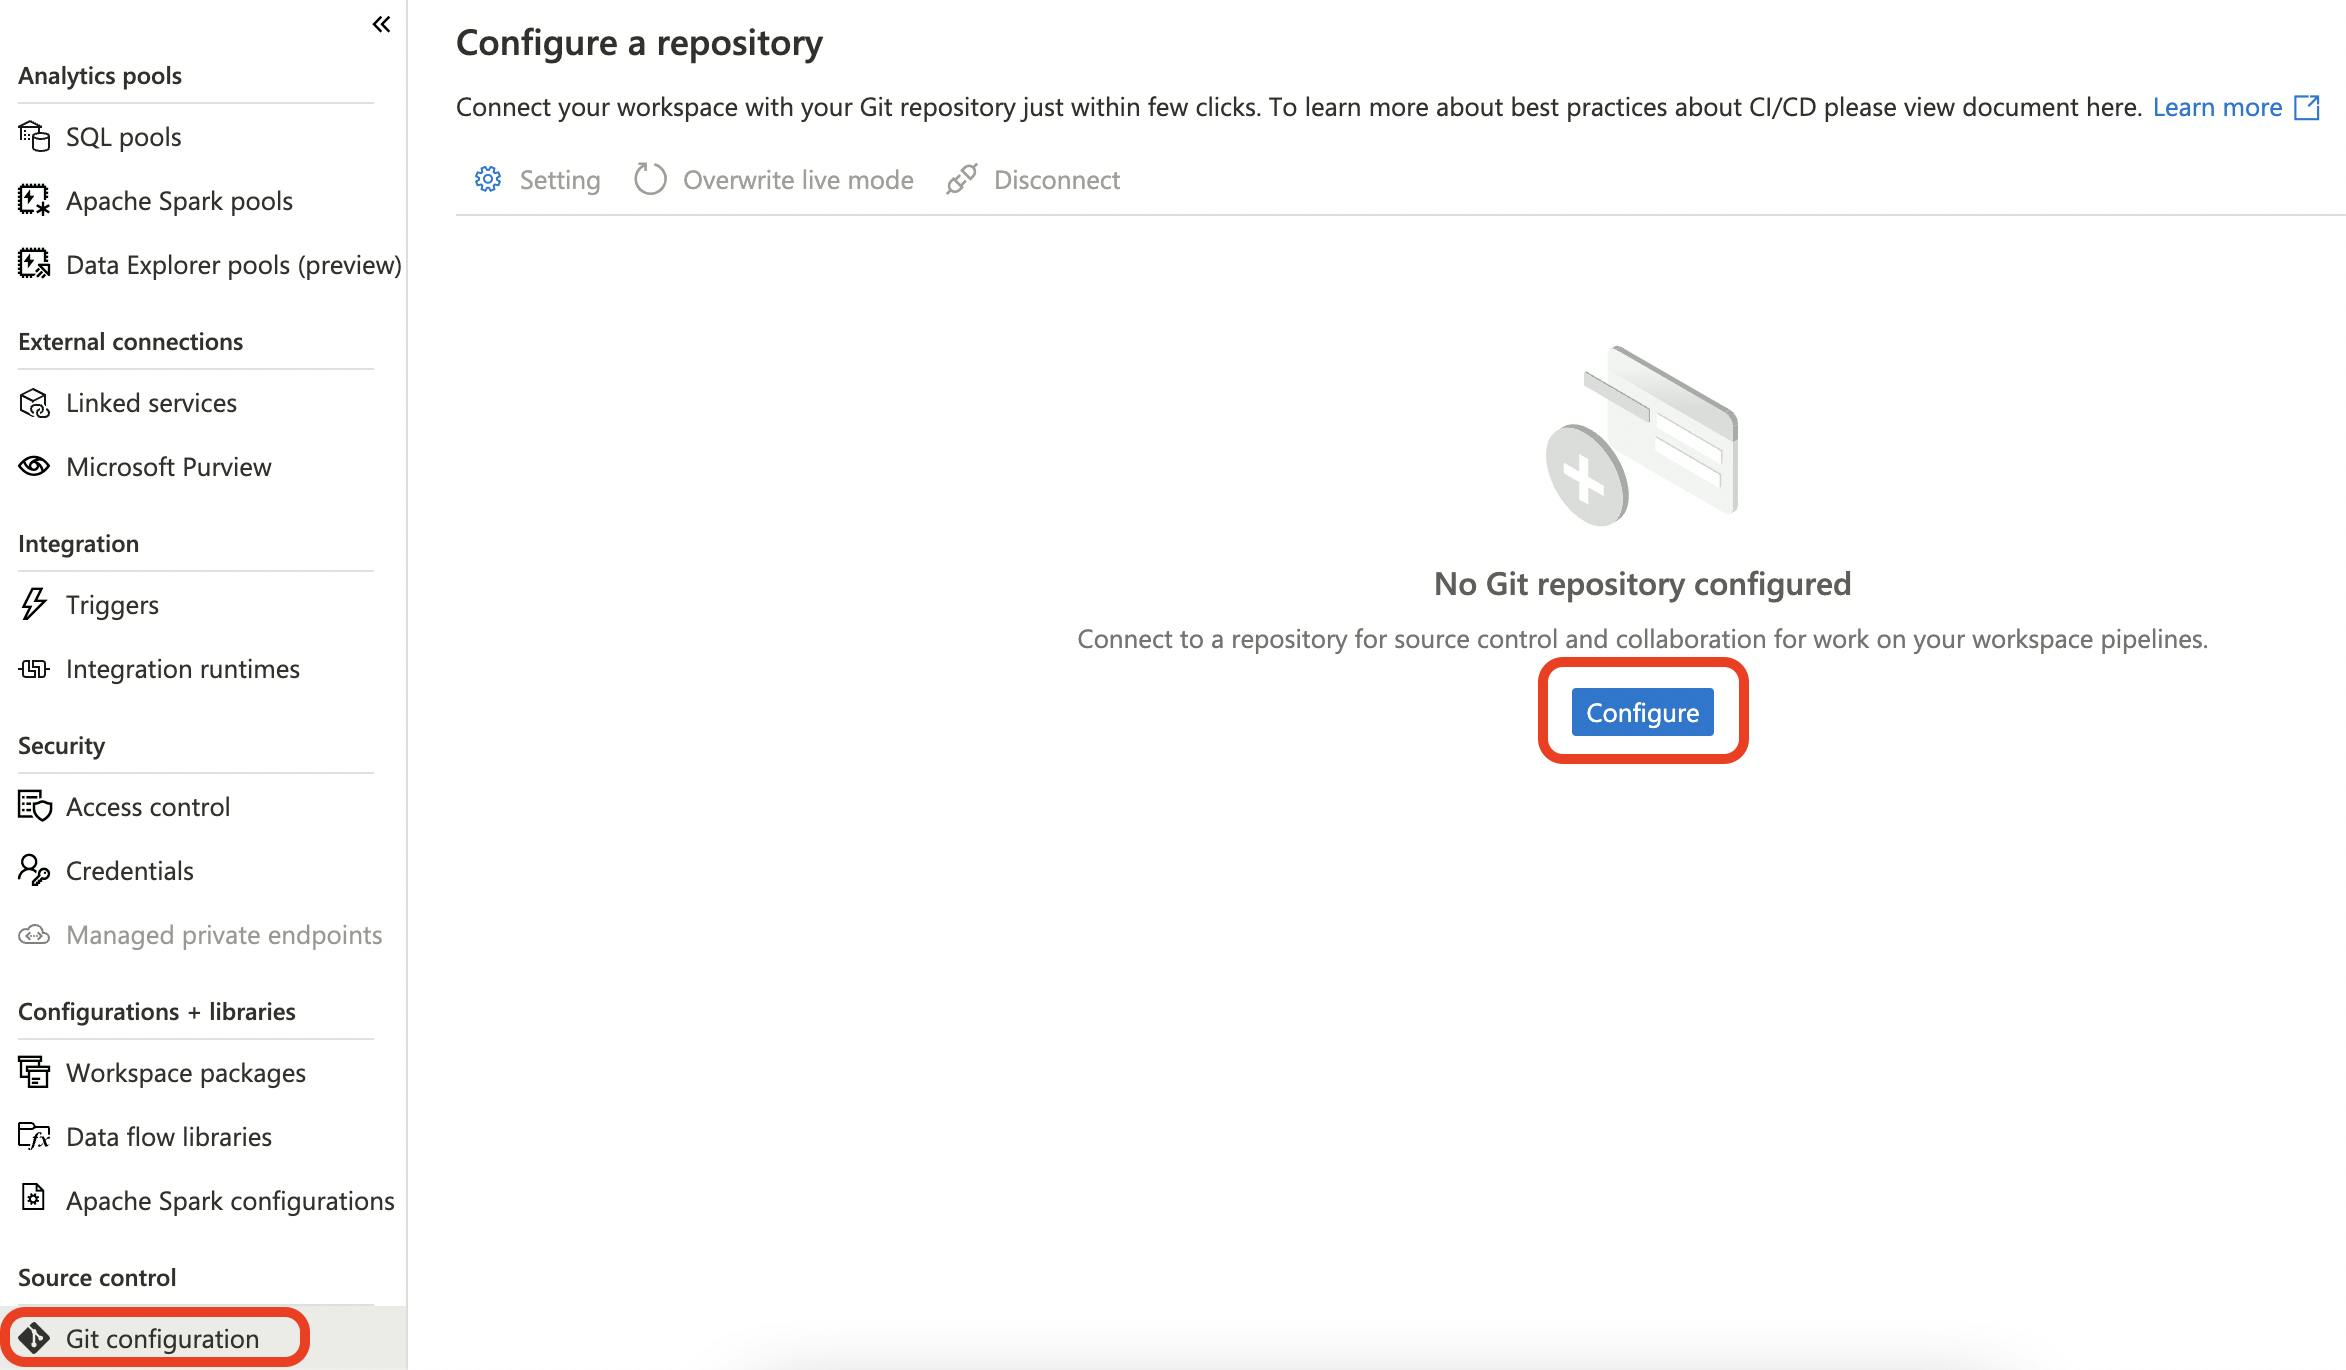
Within the administration section of the Azure Synapse resource, select Git configuration from the side menu and then click the Configure button.
I selected my repository type as GitHub and then entered the Owner where the repository is stored in. This can be either an individual's username or an organisation's name. When configured, click Continue.
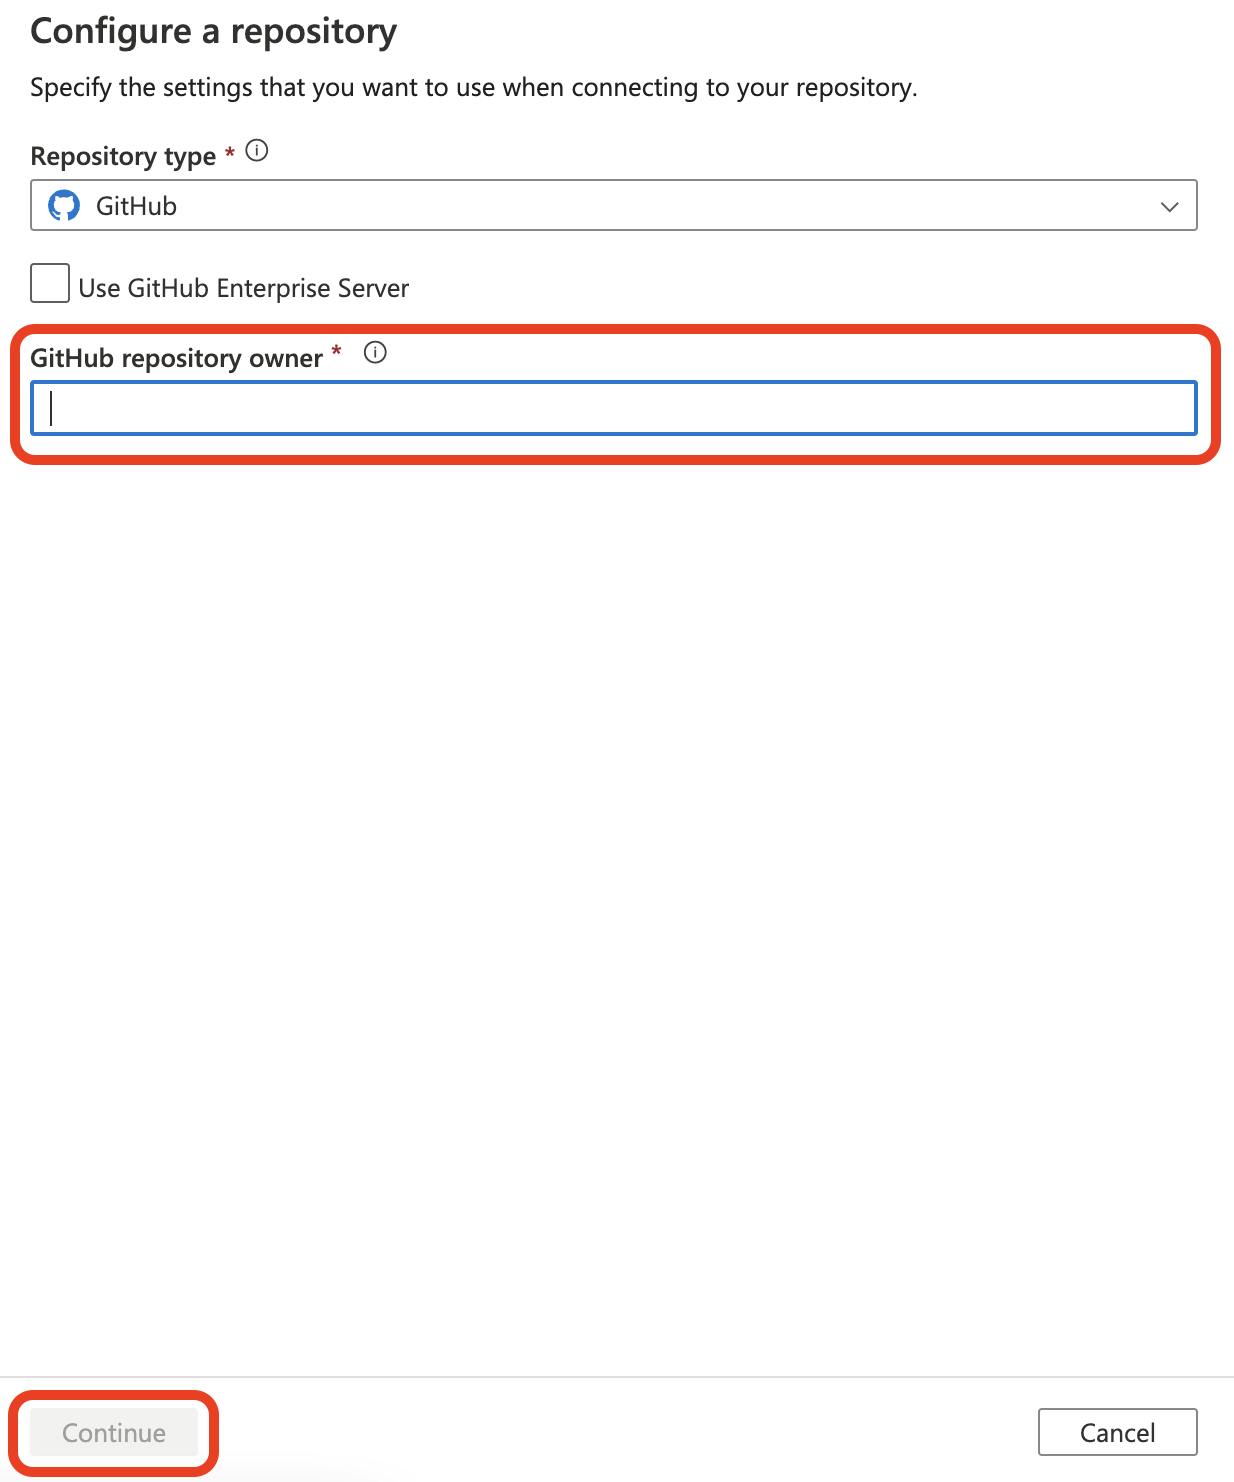
Now we need to configure what repository we want to use and the branches. Below are the configurations you should set:
Repository name - The name of the repository where Synapse will link to
Collaboration branch - develop
Publish branch - develop
Root folder - /
Import existing resources to repository - Checkbox ticked
Import resource into this branch - develop
When ready, click Apply.

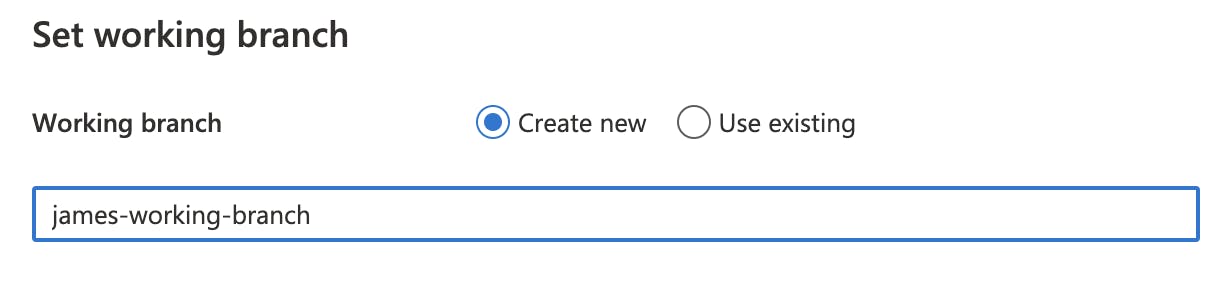
Once the initial import completes, you will be able to create a new Working Branch. This will be the branch you work from before merging the changes to the develop branch. Give you working branch a name and click Apply.
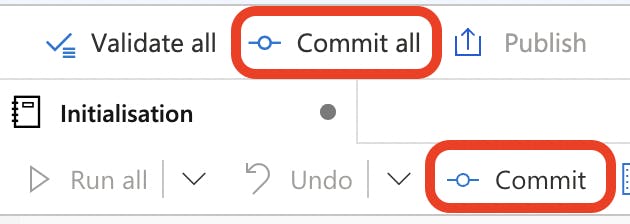
Merge changes to live development environment
You've now introduced some changes in your working branch, and you want to get this into your develop branch to see it working. First, you need to commit the changes, either select Commit or Commit All.
Then you need to select the branch name at the top left of the window and select Create pull request.
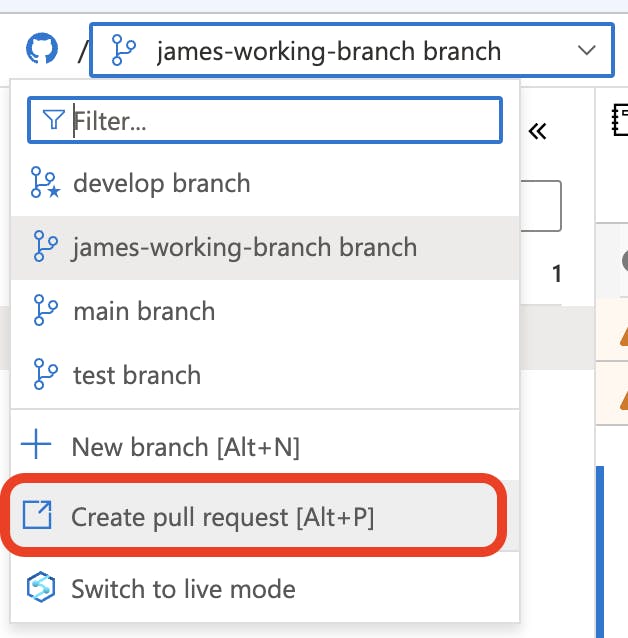
You will be redirected to the pull request window in GitHub. Here you can select the develop branch to be the destination for the merge. When created, review and merge the pull request. When the merge completes, you will have commits in the develop branch from Synapse.

Once the merge completes, you test the environment, and you are ready to merge the current branch (develop) branch; you will need to publish the branch by selecting Publish.

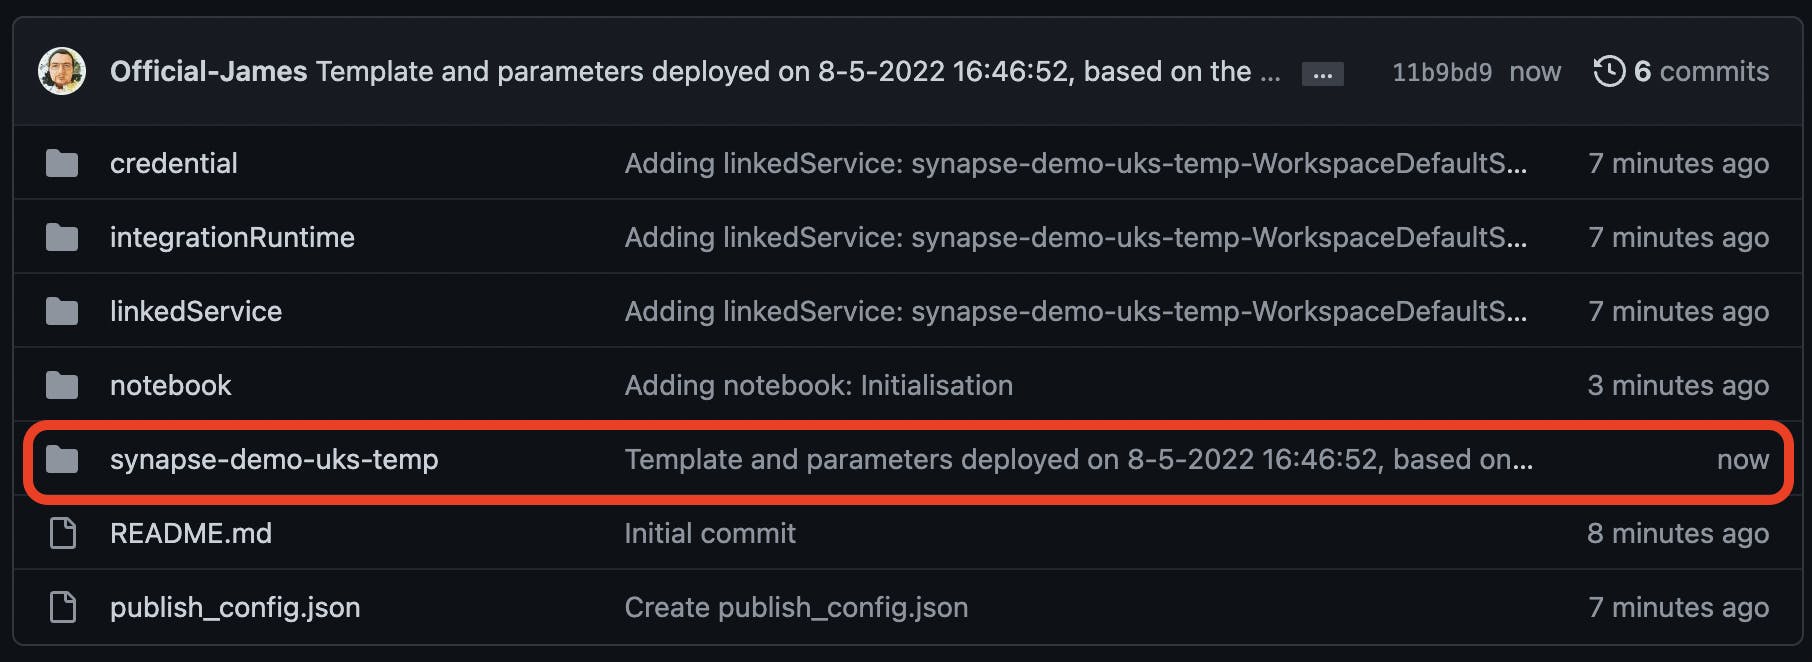
When selected, you will be presented with all changes to commit to a publication location. This will be used during deployment to other environments to deploy changes. When you reviewed the changes, you can click Ok to proceed.

When publication completes, you will see a new folder appear with the name of the development instance.
Configure Deployment
When a pull request is raised and merged from the develop branch to test, it triggers a GitHub Action where it will run the following deployment:
  synapse-cd:
    name: Synapse CD
    runs-on: ubuntu-latest
    if: github.event_name == 'push'
    environment: ${GITHUB_REF##*/}

    steps:

      - name: Checkout local
        uses: actions/checkout@v2

      - name: Stop Synapse Triggers
        run: |
          az synapse trigger stop --name "TriggerName" --workspace-name "${{ secrets.WORKSPACE }}"

      - uses: Azure/synapse-workspace-deployment@v1.6.0
        with:
          TargetWorkspaceName: '${{ secrets.WORKSPACE }}'
          TemplateFile: './TemplateForWorkspace.json'
          DeleteArtifactsNotInTemplate: true
          ParametersFile: './TemplateParametersForWorkspace.json'
          environment: 'Azure Public'
          resourceGroup: '${{ secrets.RESOURCE_GROUP}}'
          clientId: ${{ secrets.CLIENT_ID }}
          clientSecret: ${{ secrets.CLIENT_SECRET }}
          subscriptionId: ${{ secrets.SUB_ID }}
          tenantId: ${{ secrets.TENANT_ID }}
          operation: 'deploy'

      - name: Start Synapse Triggers
        run: |
          az synapse trigger start --name "TriggerName" --workspace-name "${{ secrets.WORKSPACE }}"
You will need the following secrets to be stored in each GitHub Environment. We need to do this per environment because we will have different values, for example, our test environment will not have the same Synapse Analytics Workspace name as the development or production environment.
WORKSPACE - This will be the name of the Synapse Analytics Workspace
RESOURCE_GROUP - The name of the Resource Group where the Synapse Analytics Workspace is located
CLIENT_ID - The Service Principal ID for authenticating to Azure
CELINT_SECRET - The Service Principal Secret for authenticating to Azure
SUB_ID - The Subscription ID where your resources are located
TENANT_ID - The Tenant you will be authenticating the Service Principal against
You will also want to amend the following in the workflow config above and replace it with your values:
- Trigger name will need replacing with a trigger you need to stop before and start after deployment. You can add additional lines to act against more than one trigger.
Make sure to have this GitHub action stored in your branches before raising a pull request to merge the develop branch into the test branch. Once a pull request is approved and merged, it will trigger the above and deploy to the test environment. You can then review the deployment, and when/if you are happy, follow the same process to trigger a deployment to production on merge to the main branch.